Authentication
Chariot uses client credentials to allow users and applications to access platform resources programmatically.
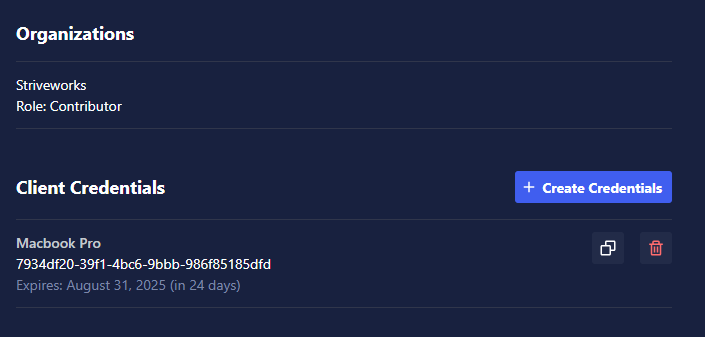
Client Credentials
Creating Client Credentials
To create client credentials:
- Click the Profile icon in the upper-right corner of Chariot.
- Click +Create Credentials in the Client Credentials section.
- Provide a name and expiration date (up to one year from the current date).
- Copy the client ID and Secret, and store them in a safe place.
Using Client Credentials
Once you have client credentials, you will be able to retrieve a bearer token, which is the authentication token used for all subsequent requests to Chariot. If you are using the Chariot SDK, it can handle token management for you once you set the client ID and Secret.
Python SDK
The Chariot Python SDK provides convenient authentication methods through the connect() function. This is the recommended approach for Python applications.
The client ID and Secret can be used with the Chariot SDK:
from chariot.client import connect

connect(
    host="https://<chariot_url>",
    client_id="your_client_id",
    client_secret="your_client_secret"
)
Alternatively, you can provide the SDK with a bearer token directly:
from chariot.client import connect

connect(
    host="https://<chariot_url>",
    bearer_token="your_bearer_token"
)
Programmatic Authentication Without the Chariot SDK
For integration with other programming languages or when the SDK is not available, you can authenticate programmatically using HTTP requests.
Getting a Bearer Token
To obtain a bearer token using client credentials, make a POST request to the authentication endpoint:
- Python
- Curl
import requests

url = "https://your-chariot-url.com/auth/client/v2/chariot/login"
data = {
    "client_id": "your_client_id",
    "client_secret": "your_client_secret",
    "grant_type": "client_credentials"
}

response = requests.post(url, data=data)
response.raise_for_status()

token_data = response.json()
access_token = token_data["access_token"]
expires_in = token_data["expires_in"]  # Token lifetime in seconds
CLIENT_ID="your_client_id"
CLIENT_SECRET="your_client_secret"
BASE_URL="chariot_url"

BEARER_TOKEN=$(curl -sL -X POST "${BASE_URL}/auth/client/v2/chariot/login" \
  -H "Content-Type: application/x-www-form-urlencoded" \
  -d "client_id=${CLIENT_ID}" \
  -d "client_secret=${CLIENT_SECRET}" \
  -d "grant_type=client_credentials" | jq -r '.access_token')

echo "Bearer token: ${BEARER_TOKEN}"
Using the Bearer Token
Once you have obtained a bearer token, include it in the Authorization header of your API requests:
- Python
- Curl
import requests

headers = {
    "Authorization": f"Bearer {access_token}"
}

# Example API call
response = requests.get("https://<chariot_url)/api/identity/v2/users/me/",
                       headers=headers)
print(f"Status: {response.status_code}")
print(f"Response: {response.json()}")
# Using the bearer token for API calls
curl -X GET "https://your-chariot-url.com/api/identity/v2/users/me/" \
  -H "Authorization: Bearer ${BEARER_TOKEN}"
PKI Authentication
For environments requiring PKI authentication, you can use either PKCS#12 files or separate certificate and key files with the Chariot SDK.
Using PKCS#12 Files
from chariot.client import connect

connect(
    host="https://<chariot_url>",
    pkcs12="<path_to_your_p12_file_or_p12_in_bytes>",
    pkcs12_password="your_p12_password"
)
Using Certificate and Key Files
from chariot.client import connect

connect(
    host="https://<chariot_url>",
    key_filename="<path_to_your_key_file>",
    cert_filename="<path_to_your_cert_file>"
)
PKI Authentication With Python Requests
If you need to use PKI authentication without the SDK:
import requests

# Using certificate and key files
response = requests.get(
    "https://<chariot_url>/api/your-endpoint",
    cert=("cert.pem", "key.pem"),
    verify=False  # or path to CA certificate
)

# Combining PKI with bearer token authentication
headers = {"Authorization": f"Bearer {access_token}"}
response = requests.get(
    "https://<chariot_url>/api/your-endpoint",
    headers=headers,
    cert=("cert.pem", "key.pem"),
    verify=False
)